All grains contain peptides that mimic morphine or endogenous opioid substances. This is where I deal with my latest loaf craving. Get your bread-based exorphin fix here.

Showing posts with label barbecue. Show all posts

Saturday, April 30, 2011

Sourdough PIzza a'la Farine with Portabellos


Sourdough PIzza a'la Farine with Portabellos 

In response to popular demand I am blogging about today's pizza.

By 'popular demand' I mean one anonymous coward suggested I continue, out of the perhaps units or even tens and dozens of people who might have stumbled upon my blog (no doubt most of them family)  -- when I last wrote about I had lost my drive to blog about pizza).  I swear, blogs are like a message-in-a-bottle-to the-universe.  To get one comment, even from someone who doesn't leave their name, is a big deal.  Why I should change what I do, based on such minuscule feedback is laughable.  But there it is.

I previously said that the pizzas were boring me now, and that is why I haven't been blogging about them.  I suspected it was because the ones I was making were not whole grain, they were white flour.  They were tasty enough, but they weren't interesting to me.  They seemed too much like junk food.

I really wanted a whole grain pizza, if I was ever going to blog about them again.

For some time now, I've been wanting to try the whole grain pizza dough recipe that one of the top bread bloggers in the world (IMHO) has shared.  The baker who blogs by the name of "Farine" posted this recipe, which was her sourdough take on the 'Five-Minute-A-Day' recipes.  She used it for pizzas that her grandchildren enjoyed.

By the way, it is worth following the link to her recipe, just to learn about phytate in grain (especially whole grain) and the reasoning behind why she uses sourdough instead of commercial yeast.  (How great a problem this really is, however, is anybody's guess.  As "Laurel's Kitchen: A Handbook for Vegetarian Cookery and Nutrition" states, longer leavening periods even with yeast doughs will increase the amount of phytase, the enzyme that reduces the amount of phytic acid that binds up the calcium, iron and zinc and prevents it from being absorbed by the body.  Laurel Robertson suggests that if the body needs the mineral or vitamin, it will find a way to absorb it despite the phytate.  Also, look here for some suggestions on benefits of phytochemicals in food, and a rather extensive list of them.)

I didn't have quite enough spelt on hand to duplicate Farine's recipe, so I used as much as I had and then I improvised.  I don't think I improved on her recipe, but it was the best I could do today.

Here is what I used:

Dough Ingredients

  • 150g sourdough, mine was 100% hydrated
  • 950g flour:
    • 427g whole wheat flour
    • 340g spelt flour
    • 131g kamut flour
    • 82g garbanzo flour
    • 95g rye flour
  • 50g vital wheat gluten
  • 787g water
  • 18g salt
  • 100g olive oil

Method

Mix together with no-knead techniques.  I had to use my hands because it was somewhat sloppy and I couldn't stir it up with a spoon.


It is supposed to stay on the counter 2 hours and then be refrigerated.  Mine sat out about 6 hours before it hit the fridge, because we went out for dinner at the last moment.


I used it the next day, instead.  I took out a handful (softball sized piece), and just set it in a ball in the middle of a pizza stone that had been liberally coated with olive oil.  Then I just spread it out, like I usually do, pressing it thinner and thinner with my fingers until it fits the stone.

This dough felt substantially different; while there was some gluten, it didn't take much effort to push it to the edges, so it was not very elastic.  I may have used a bit too much dough, too.

Today's Toppings

Since today I wanted to showcase the dough more than the toppings, I was fairly pedestrian in what I choose to put on today.


  • Tomato Sauce (to cover to the edge)
  • Sundried Tomatoes in Oil
  • Sliced Olives with Pimento
  • Half a Leftover Veggie Sausage, sliced pepperoni-thin (rubbed some oil from the sundried tomatoes over top of these so they wouldn't dry out in the heat)
  • A tiny bit of a tiny red onion
  • A small handful of oregano
  • Some Mozzarella, grated
  • Some Cheddar, grated
  • A Couple of Portabello Mushrooms, sliced thin (put some right on the edge of the pizza, so the edge wouldn't dry out in the heat)


I put on the toppings, then I stuck it back into the refrigerator while the barbecue preheated, and I took the dog for a walk.  It does take some time for the firebricks in the barbecue to heat up; probably it isn't worth it to do one pizza, like we did today -- more economical to do two this way.  But it was just us, so one pizza was all we required.

The dog and I were gone about 45 minutes, by which time the barbecue read about 600 degrees F.

The pizza on the stone is placed on the firebrick, and the lid goes down.  By lifting the lid just once like that, the temperature falls to about 500 degrees.  What you don't want to do is lift the lid again to have a peek at it.  You have to let it sit 14-15 minutes, and by then the toppings will have cooked.  You can now take it out, and it will be very hot still.  Another 10 minutes on the baking stone, and the bottom crust will firm up some more.  You can eat it right away, of course -- and we did -- but the second piece is always just a little bit better, I think.

Results

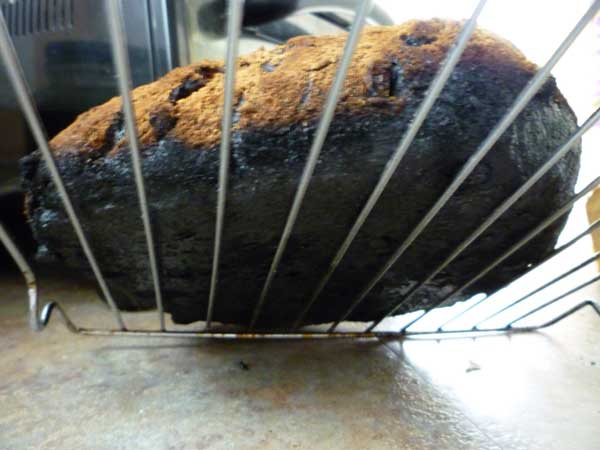
I probably used too much dough; and leaving it sit once the toppings were on was not a great idea: even in the refrigerator, it expanded a bit, and made it a bit too doughy for my taste.  I like a thinner crust.
The first piece is always a bit gooey, and very very hot.  Waiting ten minutes -- if you can -- improves the bottom crust.
Not that it was bad, per se.  I think that the kamut and garbanzo flour didn't improve it.  My wife said that the dough was okay.  She said that with her second piece, the crust had the consistency of a cookie.

I'd like to try more rye, maybe a 50:50 mix with rye and whole wheat.

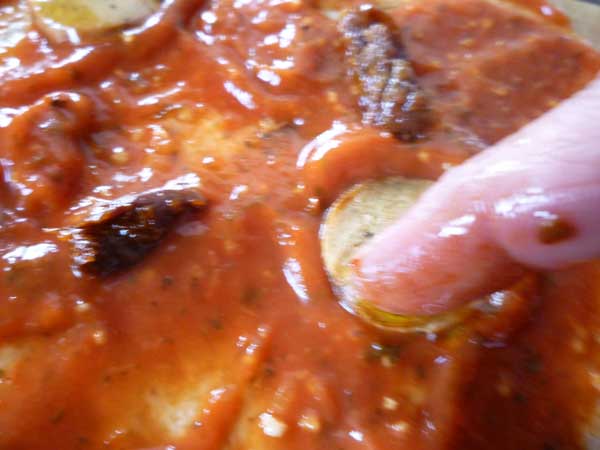
I also put too much tomato sauce on this pizza.  It was a bit overpowering.  Couldn't taste the mushrooms.

Leftovers. When it cools, this pizza is even better.  I prefer cold pizza, I don't like it microwaved the next day.
I have to use the rest of the dough in the next seven days.


Notes to Myself
  • try the real farina recipe
  • try a 50:50 recipe, whole wheat and rye flour
  • go easy on the toppings, especially the tomato sauce, which is going to soften the dough


Friday, August 13, 2010

Pizza #9 - Button mushrooms, peppers and tomatoes

Button mushrooms, peppers and tomato Pizza

I didn't really expect much from this particular pizza, so I wasn't disappointed.

I was working nights and my wife was working late.  We weren't going to see each other, but I thought I would make her a pizza on my new pizza stone I had just purchased.  Unfortunately, I didn't have any dough ready.  But the baking stone had a pizza recipe on the card inside the box, so I just whipped that up when I woke up.  I could finish making the pizza before I left for work, but I wouldn't have time to eat any myself.  Maybe it would give me some brownie points though, with the significant other, I thought: she has been working hard all week and is tired when she gets home, too tired to make anything to eat.  So I set to work.

I chose the Danesco Baking Stone not for any other reason other than it was available and was the right size.  I fully expect it to fail me like all the other stones have.  I have been researching some firebrick, though, and now that I know where to get it, I hope to get some this weekend.

Here is the Danesco Stone Basic Pizza Dough recipe, along with the weights I measured when I used it:

Dough:

1 tbsp active dry yeast (12 g?) or 10 g Instant dry Yeast (about 2 tsp)
7 oz lukewarm water (198 g (210 mls, or 7/8 cup)
2 3/4 c all-purpose flour, plus 1/3 cup for kneading ( 350 g)
1 tsp salt  (3 g, kosher)
1 tbsp olive oil (15 g)

Method:

Disolve yeast in water and let stand for 5-10 min.
Stir together flour and salt and pour yeast mixture into it; mix and then knead, perhaps 10 min until smooth and elastic.
Let sit covered until double - perhaps 1 1/2 hours.
Preheat pizza stone to 450 degrees F,
Shape the dough on a cornmeal dusted pizza peel, top it with fixings, and slide it onto the hot stone, baking for 20 minutes.

Thoughts on my Experience:

A couple of things I noticed:
1. Hydrating the instant dry yeast (IDY) without giving them some sugar to get active is pretty pointless.
2. The oil isn't really used in the dough, it is more for lining the bowls that you let the dough rise in.

I wasn't really interested in this dough since it is all-purpose, and the reason I blog about breads and pizzas is to consciously get my whole grain vs processed grain consumption up.  But there were time constraints and I wanted something my wife could eat when she went home, and she isn't as particular as I am about eating whole grains.

I didn't really follow the method at all.
I did give the yeast a surface sprinkling of sugar, but this was just a pinch (less than 1/4 tsp) and so I'm sure it didn't have all that much of an effect.  I didn't really wait the suggested 5 minutes anyway, and I don't think you have to with IDY anyway.
I didn't wait 1 1/2 hours to get this dough to rise.  It was double in about 30 minutes.

At that point, I thought I would just shape the dough and put the toppings on it.
I used the double-baking stone, barbecue method I've been developing.
This means, no pizza peel: you put one stone (the old, cracked stone) on the barbecue and the pizza goes directly on the cold stone, and you put the cold stone onto the hot stone when you have preheated the barbecue to 700 degrees or more.
In my experience, on my barbecue the preheating takes 15 minutes at max with the lid down.
Baking takes 14 minutes, and then the pizza, on its stone, is removed from the BBQ and the crust continues to crisp as it is in contact with the hot stone.

I used the olive oil to coat the stone, before putting the dough on it and spreading it out with my fingers.  But this was a new stone, and I was amazed at how the oil soaked into the stone.  It never really did get slippery.  My older stone did.  I suspect that the oil soaked into this stone just because it is new, but I don't know.

The fixings were ordinary, except for the whole mushrooms.  That was an experiment.  They all had cheese on them, so they baked without burning.

The dough with its fixings was ready for about 30 minutes before I was ready to turn on the BBQ, and I noticed that the dough continued to rise and get puffy.  You could even hear it popping as the yeast made CO2.  I suspect that this, even more than the fact that the oil on the stone soaked into the stone rather than making the surface slippery, was the cause of the pizza sticking to the stone so badly.

Other than this problem, the baking went off without a hitch. 

The next day I chiseled off a cold slice that my wife didn't eat.  I found the dough (or was it the fixings?) far too salty. 


There are much better dough recipes out there.

Notes to Myself
  • This dough is awful.  Too salty.  Too plain.  Uninteresting.  Not whole grain.  Throw it out entirely.  
  • Try making a nice Whole Wheat pizza dough. Or try a sourdough whole grain pizza dough. The Farine blog recently had one that looked interesting.
  • Do not let the dough sit with fixings on it, if you want a thin, crispy crust.  Put the fixings on as soon as you spread the dough on the stone, and then put the pizza right in the hot BBQ.  Waiting will only make the dough yucky -- in this case, I think that is what made it stick to the stone.
  • I was afraid that the edge of this pizza would burn, since I hadn't put thin mushrooms around the edge like I did on those other pizzas.  But it turned out okay, the edge didn't burn: but was this because the dough sat out a bit longer, and rose a bit, so wasn't as thin as the other doughs?
  • The whole button mushrooms worked -- but then, neither of us ate this pizza piping hot, so there was no chance for us to burn our mouths on these big mouthfuls of burning fungi.
  • See the last pizza I made for full times and instructions.

Wednesday, July 7, 2010

Pizza #8 - Mushrooms Peppers Onion Mozzarella and a Montforte Dairy Goat Cheese

This is the best pizza I have ever made on the barbecue.  Thank goodness.  I was making it for my wife's friends who had come to visit.


It was made with Lahey's dough, made with bread flour, refrigerated for a couple of days and it did continue to rise in the fridge.

I covered my round stone with olive oil, spread out the dough with my fingers, covered it with tomato pizza sauce, used the mandoline to slice the toppings very thin, put the mushies around the edge as usual so it wouldn't burn as badly, and then put on just the right amount of mozzarella.


But the secret ingredient was a strong hard cheese that we bought the other day at Montforte Dairy run by Ruth Klahson in Stratford Ontario.  I wish I knew the name of the cheese.  I've emailed the owner to find out - and to thank her for making that excellent cheese!  It was hard, like a parmesan, and it had to be carefully grated, but it had so much flavour.  I didn't even need that much of it, to make it the keynote.  It smells so fresh!  I love it!

I believe the name of the cheese is 'Toscano', made from sheep's milk, and named after the official Pecorino Toscano cheese from Tuscany Italy.  I gleaned that much from watching one of the videos on Montforte's YouTube site.

The real star of the best pizza I've ever made: 
an unknown Hard Goat cheese purchased at Stratford's Montforte Dairy


We ate the pizza with lots of salads and quiche.


Notes to Myself:

  • Preheat the first stone in the barbecue 15-20 minutes while you prepare the pizza.  On the second stone, spread some olive oil, and spread the Lahey dough out with your fingers.  It will be a very thin crust.  
  • Top with fixings, making sure that the edge has lots of wet or moist fixings on it.  When the oven is 700+ degrees, slide the stone with the pizza on it into the oven on top of the other preheated stone and quickly close the lid.
  • Resist the temptation to peak at the pizza while it bakes for 14 minutes.  Then, take the pizza and the stone it rests on to the table and place it on a wooden cutting board.  Caution everyone that the stone and the pizza are very hot.  You can cut it, but you probably won't want to eat it for another 5 minutes.  The crust is going to be crisping up as you wait, still cooking on the hot stone.
  • Have some wine handy: even with the wine within easy reach, I burned the roof of my mouth on the hot cheese.  But it was worth it!

Monday, July 5, 2010

Pizza #7 - Tomato Sauce Peppers and Fresh Mushroom 2 Cheese


There was enough food at our 'Chicken Naming Party', an excuse to get my family over.  But I baked a pizza on the barbecue anyway.

This one was a bit too soggy, and I suspect it was because the stone underneath was not hot enough, or the barbecue itself wasn't heated up enough.  We had done some sausage for our guests, and for that you didn't need it cranked up all the way.  When that came off the grill, I put the stone on and let it heat up on max, but I think that it hadn't preheated all the way to 700 degrees yet.

I let the pizza cook an extra 4-5 minutes, but that really wasn't enough to make the crispy crust I was looking for.  And of course, I'd over done the cheese again.

This pizza was special for nothing except it was the first time I used my new Mandoline to shave the peppers and mushrooms.  For that, it worked quite well.

Those who had a piece seemed to like it anyway.  There was only one sad piece left over in the fridge this morning.  But I wasn't interested, I had some bread to eat.

Tuesday, June 1, 2010

Pizza #6 - Leftovers Pizza


Nothing special.  Just used some leftovers.

I put the mushrooms all around the edge on purpose, to protect it from burning in the 700 degree heat.  That worked pretty good. Here it is before the cheese went on:


It tasted okay.  I left the pizza on the stone in the barbecue after turning it off, and the thing got nice and crispy.

Notes to Myself:
  • I think I have a handle on using the barbecue for pizza.  The more heat the better!  Crank it up all the way, and let the bottom stone (I use an old cracked baking stone for this purpose) heat to 700 degrees F over 10 minutes. Keep the cover of the barbecue down as much as possible to keep the heat inside.
  • Oil the second stone with olive oil, the one that you are going to put the pizza on.
  • Time it to about 10-12 minutes before you even think of opening the lid.  (I set the timer in the kitchen, and take my time turning it on or off, so I think 12 minutes is the more appropriate time.
  • I leave the pizza on the stone on the barbecue, with the cover up, after taking my first slices, but the gas is off.  The crust will keep getting crustier, but it won't burn.

Lahey #11 - Carrot Loaf revisited


Lahey's Carrot Loaf Revisited


On a lark, I decided to revisit Lahey's Carrot Loaf.  I still had a bit of carrot juice, and as I was digging it out of the bottom shelf, I realized that I also had a cup of coffee in here, from the last pot that we made last week and didn't finish.  I decided to use some of it in this loaf.  So this is made with 1 cup of carrot juice and half a cup of cold coffee.

Another change I made: instead of using 400 g of bread flour, I used 300 g of bread flour plus one cup of my whole wheat sourdough discard.  I used the 1/4 tsp of yeast as the recipe called for in addition to this spent starter, as the recipe called for.  This changed the hydration of the whole thing in ways I couldn't predict though.

I didn't measure the currants or the walnuts -- I just tossed in some.  There won't be nearly as many as Lahey uses.  I only had a small amount of currants anyway.


The dough was pretty gooey, so I decided to incorporate some more flour; I used the multigrain bread flour, and ended up kneading in almost a full cup, I'd say.  Then the dough had a bit of firmness to it.  I wrapped it up in the couche that I lined with wheat germ, raw granulated sugar, and cumin.

After 2 hours, I had the Dutch oven preheated on a barbecue that I was able to keep at about 500 degrees F.  I stuck it in the pot and then made my worst mistake: since the loaf was somewhat larger than the pot, I kind of squished it down to make it fit.  I should have just left it.

But it seemed to bake up pretty nicely.  After 25 minutes cover on, I took the cover off for 20 minutes.  I fiddled with the burner on the right hand side (where the pot was sitting), turning it off for the most part, only lighting it when the temperature dropped to 450 degrees.  This seemed to work pretty good.


But it didn't entirely stop the loaf from burning a bit on the bottom.  It was difficult to remove from the Dutch oven, too.

Notes to Myself:
  • The trick to heating the Dutch oven in the barbecue, I think, is to use only one burner as much as possible.
  • Would it help to oil the bottom of the Dutch oven?  Try consulting a Dutch oven recipe book for more information on how to use this iron pot.
  • This amount of coffee (1/2 c) is lost in this recipe, you could have used still more I think.  The amounts of currants and walnuts (a handful of each) is however a much better amount to use, as in this bread they are just the right amount

Tuesday, May 25, 2010

Lahey #10 - Carrot Loaf (first Lahey loaf baked in a real Dutch oven)

Lahey's Carrot Loaf 
(with Walnuts and Currants)
Baked in a Dutch Oven in the Barbecue

I mixed up the ingredients the day before.


This dough sat out for a full 23 hours before I attempted to use it.  And I'm not convinced that it was fully fermented: I didn't see much rise, and no bubbles.  I am beginning to wonder if my yeast was less than useful.

Despite all the currants and walnuts in the dough, it was fairly easy to work with, using the pastry slicer: just grab some dough with the flat of the slicer on one side, pull it out and up and over, and repeat. Nothing to it.


This was the first time I ever used my Dutch oven (excluding the time I cured it on the barbecue).  I was unfamiliar with how hot it could get in my Dutch Oven, but I knew from the pizzas I've been baking on the outdoor grill that the temperature could easily reach 700 degrees.  At least, that's where the temperature guage tops out at.

I preheated the pot for 20 minutes, and noticed at that point that the temperature was already 700 degrees with the lid down, so I backed off a bit on the propane controls (which were already set only to medium).  The dough was plopped in, and I set the timer for 30 minutes.  That was probably a mistake.

Lahey's loaves bake in a Dutch oven in a kitchen oven set to 475 degrees in 30 minutes with the lid on, and then with the lid off for another 30 minutes.   I was actually thinking I had to remove the lid and let this loaf bake for another 15 minutes.  But no, when I took the lid off, I realized I had already over-baked it.

The loaf was also a little stuck to the bottom of the pot, something which I've never had happen before, when using a casserole or other oven proof pot in the kitchen.  I just knocked it a bit with a wooden spoon and it came free for me.

The bread is certainly well-done.  But do I dare eat it?  Look at all the acrylamide.  At least half of the loaf will need to be tossed away, it is now just blackened char.


The crumb, when I got past my disappointment and regained the will to cut into this loaf, was actually not all that bad. The burned parts were quite external, and the bottom could be easily cut off, with very little waste. And the taste was interesting, as Lahey promises in his book, with a hint of chocolate.


Notes to Myself:
  • Is it time to give up baking and leave it to the professionals?  Hah!  Not now when I'm so close!  Actually, it's true -- I've had a lot of spectacular bread failures lately, and it is enough to make me want to retreat to something familiar.  But don't!  Try the next thing, and the next.  Keep working at the barbecue temperature controls until you find something that works.  
  • For example, re: the temperature on the barbecue:  if the guage reads 700 degrees, you can open the lid for a while as you turn down the propane controls.  This should quickly dissipate the heat.
  • Now that the Dutch oven is cured and has been used, you shouldn't have a problem with the burning of the oil on the surface of it any longer.  Try using it once in the kitchen oven, to get a feel for how it bakes when you can better control the temperature.
  • Try this recipe again before you lose heart.