All grains contain peptides that mimic morphine or endogenous opioid substances. This is where I deal with my latest loaf craving. Get your bread-based exorphin fix here.

Showing posts with label focaccia. Show all posts

Tuesday, March 1, 2011

Straight Dough Method Whole Wheat Focaccia with Garlic

A Quick Whole Wheat Focaccia with Garlic

Fast on the heels of the last Focaccia, the one that requires a 16-hour Biga or preferment to make, I thought I would try a straight-dough version, based on the one given to us by Chef Stephanie at our recent bread-making class.  Chef runs a production kitchen: no time for preferments here!  So the recipe that she gave us for a Rosemary Focaccia is made with a straight dough method, with one bulk fermentation and one proof before baking.

Her recipe was made with bread dough, however, and I wanted a whole wheat version.  The one I made this morning was elaborated with the preferment that I put together yesterday.  My wife likes the taste of it a lot, and so do I, but I wondered: could I make a whole wheat focaccia without that preferment?  Using Chef's recipe, I just swapped out the bread flour with whole wheat flour, and added 1 tsp of honey.  Otherwise it is the same recipe.

Oh, yeah: again I added garlic, but this time I roasted it first and added it when I punched it down after the bulk fermentation.  And I painted on the oil and vegetable seasoning mixture prior to the final proof.

Roasting the Garlic
To roast my garlic, I took 2 small heads of garlic and sliced them horizontally.  I placed these in some foil and baked them for 30 minutes at 350 degrees F.   While still quite warm, I squeezed the half-cloves out of their papery shells and let them cool.


Ingredients
  • 343g tepid water (1 1/2 c)
  • 11g yeast (1 TBspn)
  • 27g olive oil (2 TBspn)
  • 532g whole wheat flour (3 1/4 c)
  • 9g kosher salt (2 tsp)
  • afterthought 1 tsp honey

Optional
  • 2 heads of garlic, sliced horizontally, roasted at 350 degrees F in foil for 30 minutes, then peeled

I stuck the water in the microwave for 35 seconds and afterward added the yeast.
I waited until the water cooled to almost room temperature, and it didn't appear to be doing anything, that is why I added the honey -- to see if that would wake it up.
When I began to see a little action, I added the oil to the water.  Then I added the salt to the flour, and added the wet to the dry.
I mixed it up, then kneaded by hand for about 6 minutes or so.


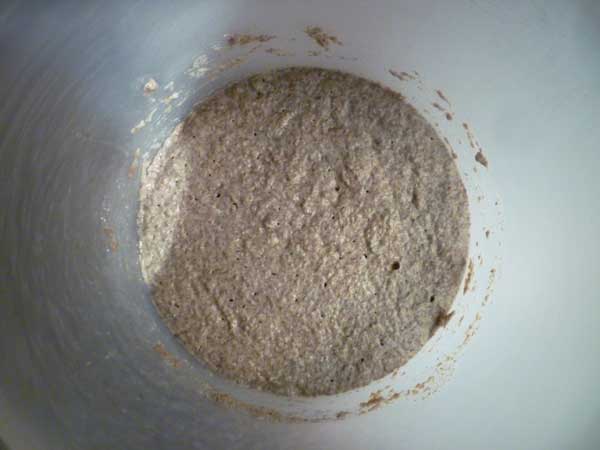
The dough was placed in a covered bowl and set in my Excalibur Dehydrator on the bread rising setting to bulk ferment.

At thirty minutes, I took it out and added the garlic by kneading for a couple of minutes.  (I first tried folding it in, but that didn't work).


Then I put it on a parchment-lined baking tray and gently spread it out with oiled fingers.
After about 5 minutes of rest, I gently spread it out some more, dimpling it as I went.  Then I spread some olive oil and vegetable seasoning on top, and let it proof for 30 minutes.
 
There was a substantial rise in volume in that time frame, and I put it into the preheated oven.

Chef Stephanie's bread flour focaccia gets baked at 370 degrees for about 30 minutes (well, that is what we determined in the college's convection ovens, from experience; the actual recipe says just to keep it in "until golden in colour").  I expected to see this whole wheat version brown in that time frame, at that temperature.  Unfortunately, I forgot to set the timer.  I think it was in the oven about 15 minutes before I peeked, and the bread was nowhere near done.  I set the time for another 15 minutes at that point.  It still looked a little blonde to me, so I kept it in another 10 minutes.  Even then, it didn't sound hollow when I tapped the bottom, so I stuck it back in for yet another 10 minutes.
 

still not quite done
Probably baking it for 20 minutes at a higher temperature (like the earlier focaccia, which was in for 20 minutes at 500 degrees F) would have been better.  The long time in the oven just dried it out before it was baked.


Results
This dough rose nicely in the proofing stage; there was little oven spring, though.  The quick rise has to be due to the amount of yeast, which is substantial.  I calculate the amount of yeast to be 3.2% of the amount of flour.  That is about high-normal for a straight dough recipe.  But does it taste yeasty?


No, it doesn't taste yeasty.  But it does taste rather dry, and I suspect that it will stale much faster than the other focaccia.    That could be because of the longer oven time.  This one has more garlic, and that garlic is on the interior, so it hasn't carmelized as much.  The crumb is not quite as holey, but that might have more to do with the garlic and the extra kneading than it does with the fact that there is no vital wheat gluten.  There is not as much spice on the top, it could have used more.


I personally like the taste of the other one better.  But this one will certainly do, in a pinch.

Notes to Myself
  • The reason this dough rose so quickly, so well: (1) the amount of yeast is substantial (2) the yeast was awakened and ready to do its job, and (3) the bulk fermentation was done in a controlled warm environment, my Excalibur.  Can you achieve similar results with less yeast?  With several stretch and folds, like the last recipe?
  • Would this bread also work with roasted peppers?  With olives?  As a free-form loaf?
  • Try baking this at 500 degrees for 20 minutes like the last focaccia you made.
  • Use more oil and more vegetable seasoning.  Don't skimp on this stuff.
  • I was comparing the nutrients of whole wheat flour to all-purpose flour in a previous blog, and I was wondering why vital wheat gluten got added to MarieH's focaccia.  There is actually less protein in a processed flour, so theoretically there is more gluten in whole wheat.  But what there is less of, substantially less, is carbohydrate that yeast can use.  What we should be doing is adding some simple carbohydrate that the yeast can eat -- about 13.8g of carbs per 100g of whole wheat flour that you use.  So, if here we are using 532g of wwflour, you could add as much as 73g of carbohydrate -- in theory.  But what form should that carbohydrate take?  Surely not simple sugar.  And if you added honey, then you would have to adjust the hydration.  You could similarly add some orange juice, but cut back on the water by that volume.  Or -- is this idea even necessary, seeing as you had a fairly nice rise in this loaf without doing all that?

MarieH's Whole Wheat Focaccia with Garlic


MarieH's Whole Wheat Focaccia with Garlic

We made a straight-dough focaccia at the bread making course the other day, and we both agreed that it was a bit starchy and way too salty for our taste.  That is the way focaccia is supposed to be, of course.  But my wife had an idea that we could put garlic with it and make it taste okay; and I had an idea that I could make it with whole wheat and make it more interesting to me. 

That is why I was happy to find Marie H's Whole Wheat Focaccia recipe posted on the Fresh Loaf Blogs, right about the time we were discussing ways to improve the focaccia we had made in our bread course.  I have translated her oz measurements to grams.  Other than omitting the salt on top of the loaf, and substituting a vegetable salt-free substitute, and adding garlic, the recipe is pretty much the same as hers.  Oh, and I didn't use a mixer, I just used my hands to knead it.  And I didn't bake on a stone, I kept it on the parchment lined pan.


Biga
  • 113g wwflour
  • 113g water
  • scant pinch of yeast

Mix the Biga ingredients.  Cover and let stand at room temperature for 12-16 hours. (mine sat 16 hours).
Biga at 16 hours

Dough
  • all the biga
  • 255g water
  • 28g orange juice
  • 340g wwflour
  • 32g vital wheat gluten
  • pinch ascorbic acid
  • 6g kosher salt
  • 2g instant yeast

Mix the dough to a wet, slack dough.
Add water to your hands and knead for 4-6 minutes until dough is soft.

before kneading
after about 6 minutes of kneading


Cover and rest 30 minutes,then stretch and fold in the bowl, and turn it over.


After kneading, just before covering and putting in my Excalibur Dehydrator to Proof

After the first 30 minutes, before folding 'in the bowl'


Repeat this cycle of resting, stretch and folding, a total of 3 times.


after folding the first time

thirty minutes later


second folding 'in the bowl'

thirty minutes later
 Then turn out onto a baking sheet lined with parchment.

I fold it a third time and turn it out onto some parchment

Optional

  • garlic cloves, peeled and cut into rough pieces
  • some Club House 'la grille' vegetable seasoning

Press with oiled hands, let rest 10 minutes, then continue pressing the dough out to a 10"x13" oval.  Cover and let rise 30 minutes while preheating the oven to 500 degrees F.  Drizzle olive oil over the dough, gently dimple the dough with greased fingers, sprinkle on garlic pieces and salt-free vegetable seasoning, and bake 18-20 minutes with steam.


Results


This dough didn't show a wonderful rise in the oven - I wonder if docking it might have helped.  If it isn't going to rise that much, what is the point of adding the vital wheat gluten?

The finished bread smells great, and it tastes okay with the garlic, too (although roasting the garlic and incorporating it into the dough probably would have been a better idea).  Does the dough really need to have a biga, I wonder, or could it be made with a straight-dough method and still taste pretty much the same?

The vegetable seasoning on top burned a bit: maybe it could be put into some olive oil and brushed on before the final 30 minute proof, instead of just sprinkling on a drizzled dough.


Notes to Myself
  • Try a straight-dough method for whole wheat focaccia and compare the taste to this one.
  • Roast the garlic and incorporate it into the dough when kneading.
  • Brush on some olive oil with vegetable seasoning prior to the final proof.
  • Try it without adding vital wheat gluten, to see if it makes a difference.

Saturday, February 26, 2011

Professional Help for the Exorphin Junkie #1

I get Professional Help for my Addiction - #1

I have been baking bread and blogging about it for about a year now (baking longer than that, but only blogging about it for a year), and I figured it was time I got some professional help.  I took my first ever bread course today at the nearby college.

This bread making course is a rather intensive 2-day course, and our instructor is one of the chefs at the college's Culinary Arts program.  When I say it is intensive, I don't mean that the loaves we made were difficult or time consuming.  No, I just mean that we moved along fairly rapidly, and made a total of 4 different doughs in one solid day of baking.  I didn't have a lot of time for taking pictures.

This course is something my wife and I have done together, on this cold Saturday in February.   We have been looking forward to it for a long time now -- almost like a vacation.  And although I was warned by several people that I probably wouldn't learn anything I didn't already know, I expected to learn quite a bit.  And I wasn't disappointed.

Chef Stephanie has been teaching for eight years, and has had lots of baking experience before that.  Many of the restaurants that she worked in serve Mediterranean meals, and some of her favourite breads are in the Mediterranean style.  That is what we worked on today, for our first lesson.

She handed out some recipes and an apron to each of us, and we began.  I have posted the recipes from day one here, in case anyone else wants to peruse them.  They are volume measurements, not recipes given by weights.  (I may be able to get the weight measurements from her, I'll see).

Chef started us off with a Rosemary Focaccia, which I thought was a great idea because there is virtually no forming of the dough: you just mix the ingredients, get a feel for it, let it bulk ferment, and then press it onto a pan. 

My focaccia

While it is proofing the second time, we were making our second dough, essentially the very same ingredients, only this time we added Sundried Tomato and Chevre (Goat Cheese).  Here, she showed us how to roll up the dough with the cheese inside it.  It is essentially the same as pushing down the dough like we did the focaccia, but instead of proofing it like that, we sprinkled some cheese on the bread and rolled it up like a log.

I got to use a dough hook on a mixer, first time ever: mostly, I do all my kneading by hand

 
My sundried tomato and chevre loaves: before the final proof, and after baking

While that was proofing, and we were baking our focaccia, we made the same loaf using Black Olives and Gorgonzola Cheese.  By now we were getting the hang of it.  This was made exactly the same way as the Sundried Tomato and Chevre loaf.  The interesting thing about these loaves, I thought, was the way she had us brush olive oil on the tops, and score the loaves BEFORE the final proofing.  I had always only ever scored my loaves just prior to putting them in the oven.  For these loaves, this pre-scoring worked well, although I really didn't see any meteoric oven spring on any of my loaves.


My olive and gorgonzola loaves, before proofing and after baking

The final loaf of the day was a Walnut and Caramelized Onion Loaf, which she allowed us to make into a free-form loaf.  I made my dough into a couple of smaller boules, and they retained their shape and didn't sag out over the parchment paper, like some of my whole wheat doughs do.  If you use bread flour, bread is a lot easier to form.
Walnut and Carmelized Onion Loaves
One of the Convection Ovens
I was pleased with the way the surface of these boules turned a nice light chestnut colour in the College's convection ovens.

Almost the entire haul of bread, made between the two of us
My wife and I came home with a lot of bread.  We ripped into my Focaccia on the drive home, and we ate some of the Black Olive and Gorgonzola loaf and the Sundried Tomato and Chevre loaf for supper tonight with a soup, and we froze some.  We'll be delivering some to our moms in the morning.

These loaves squished down a bit on the ride home.  Imagine, we forgot to take some bags with us.  Next time, we won't forget


The breads we made today are easy to make, and they taste good.  They do, however, all use bread flour or all-purpose flour.  My interests, as I have been blogging and baking, have turned almost exclusively to whole grains, but it is good to make other breads once in a while to remind oneself of the possibilities.  I am not sure whether the bread recipes that Chef gave us will translate well to whole grain flours, but I am sure going to give it a try.  (I already have a whole wheat focaccia recipe that turned up recently on the Fresh Loaf blogs by Marie H that I want to experiment with!)

Addendum:
The next day, we cut into the Walnut and Caramelized Onion Loaf.  We both think that this is the best of the loaves we made.  The Onion imparts a nice scent and a surprising amount of sweetness.  The roasted walnuts provide texture and colour (they leave the white bread stained a bit purple -- the digital photos here don't quite deliver that colouration, unfortunately), as well as an interesting taste.  This is a nice bread, almost like a desert bread, it is so sweet.  You can't eat this all the time, it is far too starchy.  But it is nice as a treat.

I am thinking that a whole wheat version of this might work, too.


Best of the Four Breads: Walnut and Caramelized Onion Loaf


Notes to Myself
  • Get the weight measurements for these recipes, and then see if it will translate to whole grains.
  • What is the advantage of scoring prior to the final proofing, vs scoring just before putting the bread in the oven?  It is possible that the late scoring will deflate the dough somewhat.  It is possible though, that you won't get as high an oven-spring if you score it too early.  Hmm.