

Six Different Sourdough Rye and Whole Wheat Breads baked in one day
After refreshing my sourdough I realized that by throwing out most of my bread due to the inexplicable mold, I would need some bread for tomorrow's work-lunch. I would try some more sourdough experiments. They are labeled 1, 2 and 3 hereafter.
Experiment #1 - the slowest loaf
I had just read a section in Hammelman's Bread (p.202) where he talks about the German Detmolder method of sourdough builds, something I have never seen written about in English before (at least, not clearly enough for me to do it. I've previously described the technique here, inadequately). I decided to give it a try - not only with my rye, but also with my whole wheat mother starter, just to see what would happen -- and these are the amounts I used:
150% Water: 1 1/2 cups
100% flour: 1 cup
50% MotherStarter: 1/2 cup


Crap. I just realized, when I was writing this out, that I am doing this not by weight but by volume. I'll continue the experiment, but I don't expect much from this experiment due to my mistake.
This bread would not be ready in time anyway. I wouldn't be able to finish building this bread before I'd be back at work. So I still needed to bake some bread.
Experiment #2 - the medium-fast loaf
With lots of sourdough that I otherwise would have to discard, I decided to just use some up in a bread that I would invent as I went along (I'd use my intuition again).
I started out with
1 c whole wheat flour
1 c rye flour
1 c all purpose flour
1 tbsp kosher salt
2 c water
1/2 c whole wheat motherstarter
1/2 c rye motherstarter


but this looked a bit runny to me, so I added 1 c more all purpose flour.

I would set this aside for about 6 hours and then (I thought) I'd bake it in a Dutch Oven.
Experiment #3 - the fastest loaf
But there was no guarantee that this loaf would perform, as the mother starter is several days old. I made another mix with identical ingredients except that I also added
1 tbsp yeast.
I would bake that in about 2 1/2 hours, on a baking stone.


I skipped a step making this dough: I did not form it, but poured it onto the baking stone after the first rise, since we had to leave shortly to walk the dog. Needless to say, the bread's gluten was not well formed, and it had not been degassed. So there was no shape for it to hold, and it flopped around the baking stone, rising very little in the oven. A disappointing looking loaf, very flat, and I thought for sure it would be very sour. The only good thing to be said for it was, it was bread, and I had something to eat if I was desperate.
Number 3 was finished.
Now I had to continue with experiments #1 and #2.
Back to:
Experiment #1 - the slowest loaf
After 6-8 hours, I further elaborated the Detmolder experimental freshers, even though I had already made mistakes with it. For Stage 2, the basic sourdough, I used
2 c flour (100%)
1/2 c fresher (25%)
< 1 1/2 c water


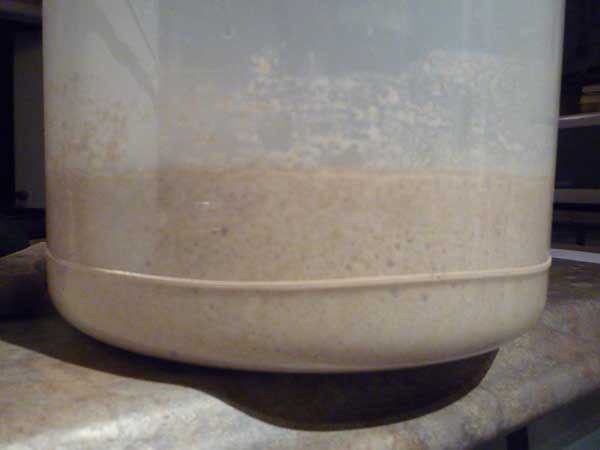
The thing is, this basic starter is supposed to be a lot firmer than the fresher. I mixed it up first of all using only 1 cup of water, and that looked okay to me. But I still had a lot of fresher, so I spread a coating on top of the basic starter of 1/2 cup of the fresher.
I did this for both doughs and prepared to set them aside for 24 hours.
Experiment #2 - the medium fast loaf
The other dough, I tried to knead, but I was finding it ridiculously too wet to do so. Eventually I incorporated about another 1 1/4 cup of ap flour, and it seemed to be less gooey. At that point I just scraped it off my hands and folded it up and placed it into a bowl lined with olive oil.

After 2 hours, I preheated the oven to 475 degrees, along with a casserole dish. I set the dough into the dish and covered it for 30 minutes. Then I took the lid off for another 20 minutes.

I was much more hopeful about this dough. The bread plumped up nicely.

I went to bed when the second and third loaves were done.
Before I left for work the next morning, I cut into both finished loaves and took some with me. I was pleasantly surprised by how good the first, quickest, flattest bread tasted. I had thought it would be sour, but it wasn't too sour at all.

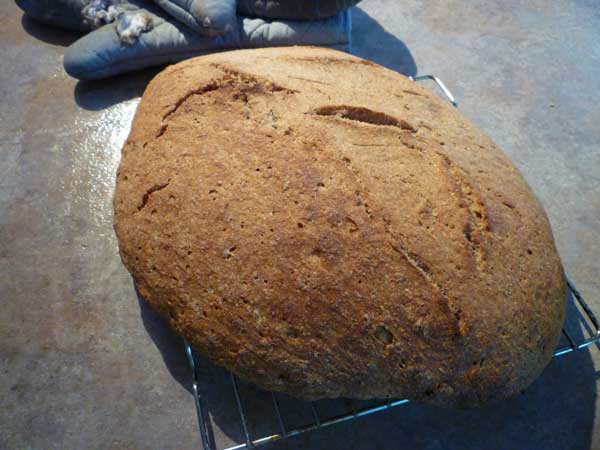
Sourdough directly from my Starter: no folds, no kneads, no forming
Despite its flatness, the crumb was moist and well-holed. The crust was chewy and full of flavour. Here is the curious thing: although I think that this loaf smells quite sour, and the next one quite nutty, my wife cannot smell the one above, and thinks that the one below is too sour. She likes the one above, and will eat it, but the one below she will never try.
Sourdough with a single build from starter: kneaded, baked a'la Lahey
To me, the second loaf tasted quite good: but the crust was a trifle bit overdone. That changed the flavour a little: the bread itself tasted good, but the caramelization of the crust made it decidedly nuttier. They were both good, but in different ways.I continue to bake
Experiment #1 - the slowest loaf
When I arrived home from work, I immediately began to further elaborate the first dough, taking it from the basic sour stage into the full sour stage. This was only supposed to rest for 3-4 hours, and then I was supposed to elaborate it into the final dough.
For the Full Sour I used the following ingredients:
655 g of Basic Sour
1 c of Water
2 1/4 c of Flour (one with rye, one with whole wheat, as before)


With this I was to obtain a medium loose paste in 3-4 hours. This was to be then elaborated into the final dough, which would come together in even less time.
Now, what I really wanted to do was to try something different: since I had already fudged this entire sourdough process by using measure equivalencies with flour and water rather than weight equivalencies, I wanted to combine these rye and wheat sourdough mixes and see what they would make together. This would make my first loaf similar in content to the second two, in terms of ingredients.


But unfortunately, I was falling asleep. I didn't think I would be able to make any more bread after 11:00 pm. And I was trying to finish a brioche ring that I was making for a Canada Day potluck at work. I had been up since 0500 and I had worked a 12 hour day. I had to work again the next day: I had to get some sleep.
I decided to take the elaboration that I had, up to that point, and refrigerate it. I intended to come back to it in 24 hours. Then I would bring it to room temperature and make the Final Dough.


But when I got home from work the next day, I was too tired to continue. I let the Final Dough wait until the next morning, and left the full sour in the refrigerator for another night.
More Later: Final Dough: Experiment #1
In the Final Dough I will use the following ingredients:
738 g of Full Sour
4 1/8 c flour (rye or whole wheat, as before)
3/4 c all purpose flour
1 3/4 c water
1 Tbsp salt
1 tsp yeast (optional)
The Next Day
I didn't get to baking bread right away. I took the full sours out of the refrigerator to come to room temperature, then I made a road trip to Arva, north of London, to get some more supplies from the Arva Flour Mill. I needed some more dark rye flour, and I picked up a few other things. When I got home, late in the morning, I had some lunch and then began.
I had enough 'basic sour' now to make:
a) a 90% rye
b) a 90% whole wheat
c) a combination rye and whole wheat, with 10% all purpose flour

The Hamelman's Bread recipe is for the rye, so I went for that first. The others were just experiments.
a) The Rye
The rye came together quite nicely. I was impressed with the way the dough clung, and kept its shape. It was not too moist, something I was particularly afraid of. The sour scent was also sweet. But when I tasted the dough, it was mild flavoured. I liked it. I mixed the dough without any extra yeast.


I set the 2 rye pieces in some couche lined baskets (dusted with rye meal) and fermented them a final hour. I preheated the oven to 490. I intended to bake the smaller one in a casserole dish (my version of a Dutch Oven), the larger one on a baking stone.


90% Rye Breads Baked by the Detmolder Method of Sourdough
Both of these loaves retained their size and shape once baked. I did score them, and they both blew apart along the scores. I baked each for the same length of time; the one in the casserole dish had 30 minutes with lid on; I turned the one on the stone at that same time, and then baked them both for another 20 minutes at 410 degrees F.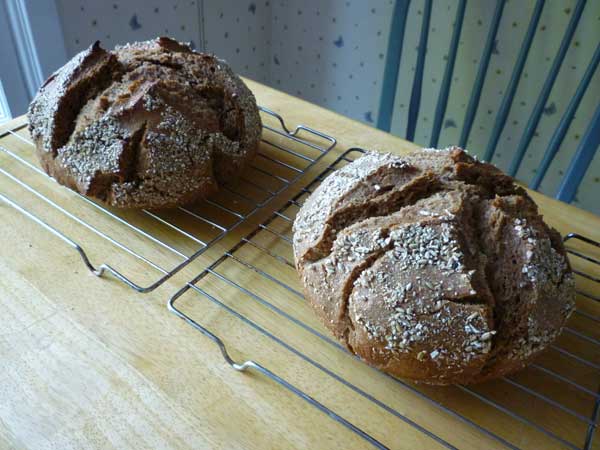
This was the bread I mostly wanted to try. I waited 24 hours before cutting into it. I chose the one baked on the stone; the other I froze, for now. The crumb of this rye bread is dense, but moist, and the crust is soft. It could have baked slightly longer, perhaps 10 minutes more. The scent is different, unlike any other sourdough I've ever baked. I wish I had words for it: it is earthy, but it reminds me of green earth. There is an herb that it smells like, a green herb, but I cannot name it. It is like a meadow after a rain. The rye taste is full, but there is an aftertaste of sour that is not unpleasant. The end result is a loaf that almost but not quite reminds me of pumpernickel. It has a kind of sweetness. This loaf is not for everybody. I like it, but my tastes are different than most, I imagine.

The crumb of the Detmolder 90% Rye loaf, from Hammelman's Bread
b) The Whole Wheat
The whole wheat dough came together nicely too. The dough was more expansive, had more gluten. I had to be careful not to over-handle it during the 4 minute kneading before the bulk fermentation step. In fact, I did not knead even 4 minutes, but set it aside when it was thoroughly mixed.


There was no real rising during either the 20-40 minute bulk fermentation. Indeed, there seemed to be little expansion during the 1 hour rising period after I had formed them and placed them in their baskets. Like the rye, I placed one in a casserole dish, and the other I put on a stone. I scored them both. They were encrusted with cracked wheat (which I find I like a lot, lately).

90% Whole Wheat made by Detmolder Method of Sourdough
The oven spring was fine. The score marks filled in during the expansion, and the bread broke apart trying to find a new place to go. The loaf that I put on the baking stone was a little misshapen, a little elongated, but that's fine.
The crumb is dense and a bit furry looking when you cut it, not unlike some completely whole wheat bread. But it is not a dry bread, in fact, it is very moist. And it doesn't taste much like sourdough, to me. I think that maybe an extra 5-10 minutes baking might have improved it a bit, but I don't know for sure.
 C
CCrumb of the 90% Whole Wheat Detmolder Sourdough Bread
c) The Hybrid Rye-and-Whole-Wheat
I built the dough from 738 g of full sour, but 1/2 of this was rye and 1/2 was whole wheat. The 4 1/8 c of flour that went with it was divided thus:
1 1/8 c whole wheat flour
1 c rye flour
2 c all purpose flour


Like the other loaves I made yesterday, I did not use yeast, just salt and water and the full sour starter.


I kneaded only long enough to properly mix it. There was a lot of rye in it, so it had that gummy feel to it. I did a few folds on the counter before I set it in an oiled bowl for an hour to ferment prior to dividing it and forming it. I used rye flour, this time, to coat the couche and the dough as it proofed.


After forming the dough, I set it aside while supper was prepared, I ate it, and then I walked the dog. So the dough had thus sat out for about 3 hours, far longer than it was supposed to. But there was no help for it. I shoved it into the oven and baked it like the others. That meant shoehorning it into the small casserole dish, and slashing the loaf that flopped onto the baking stone. This loaf was so badly mauled, it failed to rise. The one in the casserole dish fared a little better.

Detmolder Method Sourdough Breads:
The 2 on the bottom right are my hybrid Rye and Whole Wheat Sourdough
 Crumb of the Mixed Sourdough Loaf
I didn't cut into this one until a couple of days later,
(I didn't need to!) and I still found it moist and fresh,
the taste full, with a mild sourdough flavour.
A good bread, if a bit flat.

I didn't cut into this one until a couple of days later,
(I didn't need to!) and I still found it moist and fresh,
the taste full, with a mild sourdough flavour.
A good bread, if a bit flat.
It is curious to me that my wife prefers the taste of the one that took the least amount of time to make.
Much Later:
I've been pulling the loaves out of the freezer as needed, and the very last one I pulled out was actually the tastiest (to me). This was the Hybrid Rye and Whole Wheat Sourdough baked in the Casserole Dish and proofed extra long. Even though frozen and thawed, this loaf was special. The crumb was dense, but well baked (unlike some of the other ryes that were frankly a bit gooey or gummy in places). And the flavour was very nice: the rye and wheat were very complementary here. The crust was not blown apart like some of the others, making them difficult to slice. I like this loaf the best of all of them.

Notes to Myself
- There is a better blog than mine that details the Detmolder Rye technique (using Hamelman's Bread book) here at "Beginning With Bread".
- There is very little difference in taste (to some people) between breads made quickly from sourdough, and those elaborated over several builds and days. If this is true for you, why bother making the more difficult loaf? Why not just stay with the simpler 'Artisan Breads in 5 minutes a Day' or 'Lahey' methods? Do a taste test yourself to determine what you need. Remember that cheapest, quickest, easiest is not always the best: but let's be reasonable. Your time is your life. Is there something better you can do with it than bake bread and blog about it?
- Making this many loaves at once is problematic. It becomes difficult to keep the experiments straight. Even the pictures, if not labeled right away, become hopelessly difficult to understand. Figure out what you need to photograph and why, and do that and nothing more. How many 'mis en place' photos do you actually need? How many pictures of dough rising?
- Who cares what you had for lunch? Who cares what you pushed through your bowels? Why is it interesting to you? Keep that in mind when you are blogging about it or you yourself will lose interest.


No comments:
Post a Comment