

My Second Desem Loaf
This is the second desem loaf, from my 2-week old daily-refreshed, home-milled whole wheat desem (Flemish sourdough): the recipe from Laurel's Kitchen Bread Book (LKBB). As I pointed out before, the desem technique and recipes make up the bulk of that book's chapter on wheat, and their gushing praise for breads made this way make you want to try it, at least once, before you die. Even if it takes a long time to get the desem up and running, and a lot of manual labor.
LKBB says that the desem really takes a couple of weeks at least to get to its full potential, in terms of rising a loaf in a timely fashion. I may yet post a separate blog posting for how I built up my desem over a 2-week period. It's done, I just have to get organized and do it.
I was hopeful that I might see more rise this time than I did on my first desem loaf.
The first time I made this bread, I found it to be a nice dough to work with but a bread that was a bit of a chore to eat: although it tasted great, it was a dense loaf that was hard to cut into, and it seemed to stale quickly. That, unfortunately, seems the rule for whole wheat breads that are made from newly milled flour, and I think it is because of the oxidation of the oil from the grain that is newly exposed. This is so different from rye bread, where the flavour and even moistness develops if you leave the loaf for 24 hours before slicing it. I would now propose that a desem loaf should be eaten on the day it is made.
Of course, I also think that the desem loaf's rise is going to depend a lot on how finely milled is your grain. For the desem, the sourdough itself that you are feeding daily, you certainly want to use only freshly home-milled flour; and this can be a fairly coarsely milled flour, too. You are, after all, just trying to use as much of the naturally occurring yeast, most of which is going to be on the outer part of the bran, and waiting to feast on the starches within. But for the final bread, you want to mill your flour as fine as possible. Running it through the mill twice might be a good idea: once to crack the grains to a chunky size, then at a finer setting to get a nice flour for bread. You still want the whole grain, so you don't want to sieve it or bolt it. You want the full extent of the vitamins and minerals, fats and fiber that are in the whole grain, so it would be unfortunate to leave anything out.
I think that my bread suffered a little from being too coarsely milled. Also, hydration is a bit of a hit and miss. The LKBB people don't provide a recipe based on grams, like I am used to now in my recipe books. Instead, they provide a recipe based on volume measurements, and how the dough should feel. The problem with this method is that things are inexact; and if you've never made it before, you really don't know if what you are feeling is the way it should feel. Really, I was just 'feeling my way'. I did make some weight measurements along the way, but with only 2 weeks of desem under my belt, I am surely no expert in the making of this bread.
Consider this a trail of bread crumbs for others to follow, if they want to try a desem of their own. This is also a record of what I did for myself, as I am always experimenting with grains, flours, doughs, breads, and after a few months it all blurs together.
To catch up to speed:
On Day 14 of feeding the desem, I had added a full 1 cup of flour to the desem, and only enough hydration to make it slightly sticky after 10 minutes of kneading. I divided this into quarters, and reserved 1/4 for the ongoing desem. I was intending to bake with the remaining 3/4 of desem, the next day.
Without further ado, this is my Desem Experience, from Day 15 of my Desem Experiment.
Ingredients:
2 1/4 c Desem 657g (measured just before baking to be 649g)
1 1/3 c cool water 312g
3 c whole wheat freshly milled flour 468g
2 1/2 tsp (table) salt - I used 12g kosher
This time, since the desem felt more moist than the week before, I went with the lower suggestion from LKBB for the amount of water, 1 1/3 cups.
Method:
Soften Desem in water
Stir in salt, flour, mix to a stiff dough.
Knead 20 minutes or 600 strokes
Cover in a bowl at 65-70 degrees F for 4 hours (but it may be as long as 8-10)
In the last hour, deflate the dough
Make a foot shape.
Rest 15 minutes.
Repeat a foot shape.
Proof 1 1/2 - 2 hours at 95%-100% humidity.
Bake in a casserole dish at 450 degrees F until the crust browns
Then bake at 350 degrees F for the rest of a full hour.
My experience:
I was pretty hopeful that my desem now had good rising potential. Overnight, the 3/4 of desem that I was going to be baking with showed great promise.

The desem I will bake with, and the daily recipe cards that got me this far

This desem rose this much overnight: I had great hopes for this sourdough

The final weigh-in for my desem before baking
I softened the desem in water, as usual, and then mixed it up with the freshly milled flour. When first mixed, it is so very coarse you doubt that it will ever come together as dough.

Softened in water

The desem doesn't absorb all the water, so once it is softened you still have to add the water

Coarse dough
This dough was a bit coarser than the dough I mixed up for the original loaf, and it felt different: I didn't have the happy farty noises that I experienced previously. The hydration was slightly different too. Although I thought I was using less water, it seemed wetter, and I think that this is because the desem itself was wetter.

5 minutes into the kneading

10 minutes into the kneading

15 minutes into the kneading

20 minutes of kneading: done
Over the long period of kneading, however, a lot of the hydration differences did seem to even themselves out. The dough eventually did take on different characteristics with the kneading. Early on, I felt it was easier to use the scraper and knead with one hand, but later the gluten developed and I got too much resistance to use this method, so I went to a 2-handed method.
The dough was then covered. I was hopeful that it would show some rise within the 4 hour time frame that a well-developed desem is supposed to have; after all, the desem that rose so well overnight actually rose to that height in about 6 hours. So I checked the dough at 3 hours (since you have to degas the dough gently for the final hour). I thought it could use some more time, so I waited another hour, and then another hour. I can see from the pictures that I probably should have waited even longer before I degassed it. Probably this new desem did require a full 8 hours to rise.

Beginning of Bulk Fermentation

3 hour mark

4 hour mark

5 hour mark

6 hour mark

I degass it gently

7 hour mark: this is what I'll use
In making the envelope folds, or foot shapes, as it is described in the LKBB, I may have inadvertently pulled the gluten cloak too tight. Any sort of tear in the gluten cloak is going to have an adverse effect on the final crust, so you have to be careful here. Dough made from coarsely milled whole wheat flour is not going to be as resilient and forgiving as a dough made with bread dough.

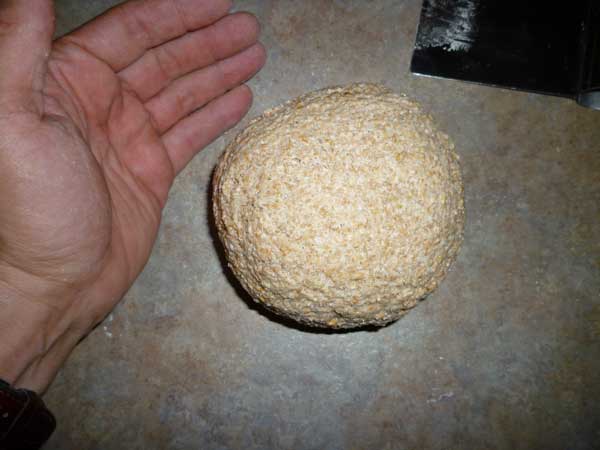
Divide the dough for 2 small loaves

gently form into balls without disturbing the gluten cloak

ball the second

flatten the ball

fold like an envelope, step 1

Envelope folds, step 2 and 3

Envelope folds, step 4

Pull the dough down around the edges and set them on their 'foot'

Rest 15 minutes

Again: gently flatten,

and do the envelope folds

heel of hand presses the folds together

fold it in this way, and then the other way, then over top

Heel of hand pinches the final fold shut: this is the 'foot'. Reminds me of a puffball.
A little bit of rounding, so this gluten cloak is as tight as it can be, and it sits on the foot
I had used the oven about an hour previously, so inside the oven was still a bit warm (not hot, just warm); I used the oven's warmth to provide my high humidity, putting the formed loaves in a roasting pan coated with mist in the warm oven. LKBB advises you to put it in a plastic bag for this step, but I didn't have a plastic bag that would work, so I improvised.


No use sulking over these sulci
Unfortunately, after the allotted time period, my desem loaves had deep sulci or grooves in their surfaces. The various levels of my bread's gluten cloak were torn, unwinding like the interior of a golf ball that had been sliced with a nine iron.
I put the loaves in casserole dishes and covered them for the initial baking, uncovering them 30 minutes in. This is different than the directions, but I took my cue from Lahey's method. I wanted my desem to rise in the oven.

Drop it in the casserole dish

Dock it

For my other casserole dish I used the lidded interior of a slow cooker
But there was no oven spring.


I did not cut into the bread until the next day. They are hardpan-crusty, but not so tough as the first desem loaf I baked. They taste fine. But they are still very dense, and they stale quickly. I'm sure I won't get through both loaves before they are too stale to eat. Likely the chickens will get the final crusts, softened in water. Or perhaps I will add it, like an altus, to yet another bread.

The second loaf I didn't get to for a couple of days. I expected it to be stale, but it was not. It was actually quite nice. Here I am having some with some very thin slices of Grana Padano cheese. It is easier to cut with a thin, finely serrated knife.


Notes to Myself
- I thought you should try to eat your desem loaf on the day it is made, expecting it to stale quickly. However, it does keep well for several days; the flavour improves and so long as it remains moist is very nutty.
- Mill your grain as fine as possible for the final baking day.
- Make sure your dough doubles before degassing it. Give it 8-10 hours if it requires it!
- Knead as long as you need. If it needs more than 20 minutes, hey, so be it.
- Be gentle with the gluten cloak, don't tear it when forming the loaves.
- Be vigilant with the temperatures given in the book especially during the high-hydration period. Would coating the gluten cloak with a bit of extra very wet starch (like what you find on your hands after 20 minutes of kneading) help keep it from developing the deep grooves during expansion?


No comments:
Post a Comment