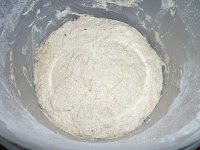
Ah yes. Time for another classic bread failure.
Long before this blog, I once made one of these yeasted pagnotta loaves from the Fresh Loaf blog that had a unique airiness and a brittle, crackling crust. I have since made the recipe a couple more times and have had failures each time. And I think it is because I think I can innovate. I cannot innovate. I can only meddle, and this loaf proves it.
Did I say loaf? More like giant cracker.
When I made this bread before successfully (long ago, long before this blog of mine), it was as an experiment in working with a high hydration dough using the spatula (another 'The Fresh Loaf' bloggers had done it this way, but I just can't find the link right now), and keeping the dough in the bowl (as opposed to trying to put it on the floured counter to knead or form. One dips under the dough with the spatula on one edge, brings it up, over the top, turns the bowl, and does it again 90 degrees to the next side. One does this 3-4 times (well, the time I did this successfully, I did it 6 times). Today I did it 4 times. Then I transferred it to a basket (banneton) that had been lined with a couche, and the couche was lined with whole wheat flour and cracked wheat.
The problem this time came when I decided that I didn't need to cut the dough in half, and so I used the whole thing on the hot stone. I should have known better: just moving the couche lined basket with the dough in it to the top of the stove, in preparation for flipping the basket and baking it on a hot baking stone, this dough was quivering like a bowl full of tapioca. There was a lot of air in the dough. Not much structure, though. I had only proofed it 1 1/2 hours, not the suggested 3 hours.
Of course, the dough sagged off the edge of the baking stone, and flattened out when I cut some off before closing the door (otherwise, it would have likely dripped down to the elements of the oven and started to burn).
I just watched it drip into my lower pan, where I usually dump a large glass full of water to provide steam to my loaves. Periodically I would dump some more water there, not so much for the loaf on the stone, but so the dough in the bottom tray wouldn't turn to charcoal and start stinking up the house.
All this just because I wanted to use up some sourdough starter, and this recipe calls for about 400 g of it. The ingredients:
Starter: 400 g starter (Unlike the Fresh Loaf bloggers, mine wasn't 100% hydration)
[Note: the one time when I made this successfully, it was with their 'faked' starter,
using 200g flour and 200g water, with about 1/8 tsp yeast; it has to sit out all day and then
go into the fridge overnight]
Final Dough: 650 g waterThe first 30 minutes was in a plastic container. Then I moved it to the blue bowl for some spatula turning.
700 g All Purpose flour
50 g Rye
50 g other flour (I used spelt)
1 tsp yeast (that makes this bread a hybrid)
18 g salt
Every 30 minutes I would pull the dough upwards and then over the top, using the spatula to lift from the bottom of the dough. I did this about 4 times, I guess; maybe 5 times. Just before I set it in the banneton, I was pleased to see that it was starting to get some real fermentation bubbles.
That is the 'before' proofing picture. Here is the 'after' proofing picture -- just before I upend the loaf onto the hot stone.
And here is the best I could do, in trying to get the thing onto the hot baking stone.
The cleanup is such a waste, usually. But this time, I got to feed this stuff to my chickens. They seemed to like it.
As ugly as this bread is, it tastes pretty good. I'll probably end up cutting it sideways to eat it.
Notes to myself:
- Stop, already. Unless you can make this using whole wheat, or some other whole grain version, quit trying to make this bread.
- But if you are not going to stop, try following the actual instructions: let it rise to double, then start playing with the spatula; alternatively, use the video method of working with high-hydration dough. Once risen, cut the dough in half, and place one of the halves in your couche lined basket. Let it proof for a complete 3 hours, minimum.
- Your sourdough motherstarter is not a 100% hydration starter. Do you really want to start one of these? No.


No comments:
Post a Comment