All grains contain peptides that mimic morphine or endogenous opioid substances. This is where I deal with my latest loaf craving. Get your bread-based exorphin fix here.

Wednesday, March 31, 2010

Everyday Bread #4

Long before I started this blog of my own, I was experimenting with a Detox Bread that supposedly was endorsed by the long dead but influential German Naturopath Louis Kuhne, who otherwise championed mostly a raw vegetable and fruit diet.

I'd like to revisit that loaf for today's 'Everyday Bread', only I'm going to try something a bit different not only in the ingredients, but also in the way I mix it, and the way I fold it up.  Kuhne's original loaf was just graham flour and water.  I didn't have graham flour back then, so I tried rebuilding that 'unbolted flour', using all purpose flour, bran and germ.

The last time I made this loaf, I used a bit of yeast, and just mixed it all together into a single dough.  This was the result.  Pretty dense, right?


In today's version of the recipe I'm still rebuilding the flour, but in addition to those grain parts, in this recipe I will add yeast, and substitute milk for some of the hydration.  And I'll take advantage of the fact that the grain parts are in different form to pre-ferment the bran and germ, and use the plain all purpose flour for the heavy work of lifting the dough in the way I put it together.  The original idea of soaking the bran and germ comes from other members of the Freedom Gardens bread group where I originally tried making Kuhne's bread; since working through Reinhart's book, the idea of pre-fermenting parts of it begins to make much more sense to me.

The idea behind rebuilding the flour is to include everything that is in the original wheat, in the same percentage ratios (endosperm : bran : germ = 83 : 14.5 : 2.5), but to mix them up separately.  Kuhne only added water, but I will also add yeast, and milk -- and why not some salt, while I'm at it? -- for this experiment.

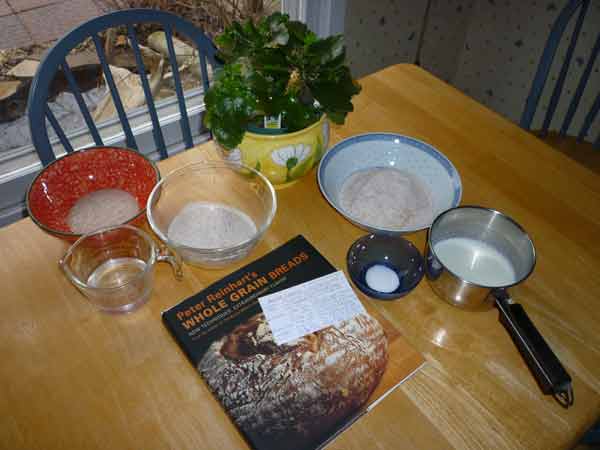
To invent this recipe, the first thing I did was look at the entire ingredients (this picture was snapped before I thought of adding salt too). 


Total Ingredients for 1 loaf:
644 g -- 4 1/8 cups all purpose flour
81 g   --1 2/3 cups bran
8 g     --1/8 cup wheat germ
213g  --1 cup water
210g  --7/8 cup milk
5 g     --1 1/2 tsp yeast
4 g     --1 tsp salt

?
1/2 tbsp honey omit
1/2 tbsp butter

It makes sense to me to preferment and refrigerate the wheat germ and the milk, so I planned to mix those together.  Originally I was going to simply divide the rest of the hydration between the flour and the bran, 50:50.  But when I looked at all the ingredients set up in this way (see above), I grew dubious.

First, it didn't look like there was going to be enough water to mix up the all purpose flour.  So, I thought I would be reserving a bit of the milk to help out.  So I just added 1/3 cup of the bran and 1/4 cup of the milk at a time to see what I would end up with.  Not only did the milk mix up the germ and all of the bran (see the picture with the mixing bowl with spoon, below), it was also able to incorporate a cup of the all purpose flour (see the picture with the mixing bowl without the spoon, below).  So I just made one bigasoaker of all those ingredients. 


Obviously I'm just making this up as I go along,  And that is actually the fun part.

BigaSoaker:

    8 g            1/8 c wheat germ
    81 g          1 2/3 c bran
    156 g        1 c all purpose flour
    210 g        7/8 c milk
    1 g            1/2 tsp yeast   

Mix it thoroughly and refrigerate overnight

Dough:

   
    488 g        3 1/8 c all purpose flour
    240 g        1 c water 
    253 g        1 c water + 3 1/2 tbsp
    4 g             1 tsp yeast
    4 g            1 tsp salt

    When I looked at what remained of the ingredients, however, I was still worried that this wouldn't be enough hydration for the flour.  In Reinhart's Bread Baker's Apprentice, he says the classic French dough has 100% flour, 60%water, 2% each of salt and yeast.  To get the rise of the dough that I want, I should be in this ballpark, so how much hydration should I require?  60% of 488 g is 293 g of water.  I would have to add 53 g to the single cup that is already there -- which works out to be 0.2208 c (pretty darn close to 3 1/2 tbsp).

    So, to the above hydration, I added 3 1/2 tbsp water.  This was, to my thinking, still pretty dry so it was difficult to incorporate by hand, but was accomplished by kneading it for about 10 minutes.

    Knead until it is some kind of dough

 This is one tight little ball of dough.  Since it isn't all that hydrated, I had some doubts that it would double, certainly not in 2 hours.  But I set it aside to watch what it would do.


    Cover.  Let it rise 2 hours.
I don't think it doubled in size, but I did get some volume expansion.  It still feels quite tight to me.


    Then put it on a lightly floured surface and press it gently into a rectangle.
If I didn't know I am a vegetarian, I would swear that this looks like I'm adding raw hamburger here.


 Spread the bigasoaker on top.


Roll the whole thing up and shape it into a batard

This dough is not sloppy.  In fact, it is almost too easy to work with.  I was trying to be gentle with it, but I probably should have been more interested in rolling it up very tightly, so that the gluten got a good stretch as it curled around the bran and germ mixture.


Shape into a batard shape, more or less.


    Proof it 2 hours

    Score it, Paint with butter, sprinkle seeds

At this point, my wife wandered into the kitchen to make herself some tea.  She saw the end of this dough, and could see that something was rolled up inside it, so she asked, "What's inside it?"

I laughed.  She was not going to like the answer.

"Why do you laugh?  Is it something I won't like?"

I nodded.  "What does it look like to you?"

"It looks like dates."

"No.  It's bran."

"Bran!?  Why would you put bran in it?"

"Because its never been done," I told her.  At least, to my knowledge, its never been done this way.  "That is what makes it fun."

"Oh well," she said, as if I had done something not quite so irretrievably stupid.  "At least it will all fall out."


    Preheat the oven and bake at 350 x 20 minutes with steam, turn it once and bake another 20-30 minutes.


The finished loaf, cooling on the racks.  And first taste test, below.  Even my wife likes this bread.  She is surprised by how moist the bran is, and how sweet it tastes without honey.  And no, the bran doesn't all fall out, it is so moist it holds together in the loaf. My wife even likes the crust.  I wonder what I can do, though, to prevent the crust from breaking apart the way it did.  Looks like Harry Potter's forehead -- a lightning bolt.


Notes to myself:
  • Try soaking some flax seeds with the bran overnight next time.  Will their omega-3's survive the baking, I wonder? Worth a try.  Check the smoking point of flax seed oil, and compare that to the interior of baking bread.
  • Would this work with a boule?  A fist-sized lump of soaked germ and bran surrounded by a white flour coating?  Give it a try.
  • What if you soaked the all purpose flour in milk, and the bran and germ in water?  What if they both fermented overnight?

Monday, March 29, 2010

Whole Grain Breads Master Formula - yeast version

Reinhart advises his readers to bake this Master recipe 2-3 times before moving on.  Ever the obedient student, I'm having another go at it. 

This is only my second real attempt at making one of Reinhart's breads, from his book 'Whole Grain Breads'.  It is basically the same recipe as my first attempt, a 100% Whole Wheat Sandwich bread only this time I'm going to be making the commercial yeast version, and leave aside my wild starters.  This will give me a chance to see how the dough is supposed to feel, according to his suggested schedules.  Last time, when I made it with my sourdough starter, I had long waiting times, and I'm not sure if one of my pre-ferments actually rose properly.

Once again, this recipe takes two days to make.  Luckily, I'm working my way through some old everyday bread, so I don't have to worry about running out while I make this bread.

Day 1: Mixing the Soaker and the Biga

Here is the mise en place shot.  Note that this time, the Soaker ingredients are on the left, the Biga ingredients are on the right.  I have followed my own advice from the first try, and doubled the recipe.  When you do this, you begin to notice that the quantities are a lot closer to those given in the 5min/day recipes.  I have stated elsewhere (on other web sites that I frequent) that when you get to the stage that you can refrigerate the two pre-ferments, there is really not much actual difference between Reinhart's methods and those of the 5min/day authors, except for the kneading, shaping, proofing and baking!  What I mean by that is, Reinhart's methods go into a lot of detail, and he examines every minute factor, and you learn an awful lot.  But in the end, all you are doing is mixing up some dough, putting it together, shaping it and baking it, and if you get good at it, in theory it should get to the point where it is as simple and fast as the 5min/day breads are.

Towards this end, this time I measured the ingredients by volume instead of by weight.  I think I did this out of some misguided thought that kitchen volume measurements are quicker.  After making it, however, I'm not convinced of that.  Weighing the ingredients is probably quicker -- but it does dirty a few more bowls (you have to zero the scale with every new empty bowl you use.)

But one thing I noticed, by measuring by volume is that when you double the recipes, the strange measurements Reinhard gives for kitchen volumes begin to make sense.  I don't think that he ever meant for anyone to make these loaves one loaf at a time, they way they are presented in the book.  If you are going to make one, you might as well make two, or three, or four, for all the extra work it is.


The biggest difference between the 'wild yeast starter' version I did before, and the 'biga' method with commercial yeast that I am doing today is that this time you have to refrigerate the biga immediately for (at least) 8 hours.  There is no additional time on the counter for the biga to double or rise.  You knead it for those 5-6 minutes, as per the instructions, and then forget about it in the fridge.  It doesn't take all that much work or preparation.  I put the biga in the bigger container, thinking that it might double or more while fermenting in the refrigerator.  But it doesn't require that much room.  It doesn't expand much in the fridge.

While surfing around, not needing to do anything else today in preparation for the bread, I found a TED video of Reinhart speaking on his whole grain techniques.  Reinhart as a teacher puts a great deal of emphasis on mise en place.  For home bakers who are perhaps distracted by so many other things (as I am, for example, with work), and for those who are not his daily students who have to show up every day to his kitchen for a certain amount of face-to-face teachings, there is something else that I find is even more important.  What is more difficult to organize is not things in space, but things in time.  I don't know much French, and I'm only going to embarrass myself by trying, but perhaps what we need is mise en heure.  Or better yet, since we are trying to produce something, this is a production, a process, maybe we can borrow that phrase from theatre:  mise en scène.  


Reinhart actually gets into this, when he suggests that the refrigeration steps are designed to allow the baker to manipulate time and ingredients.  Somehow, everything has to come together to make bread.  To do this, you have to get organized.  Sure, gather your ingredients and tools and have them ready.  Know what you are going to do.  But the biggest problem for me is getting everything together in a timely way.  I can read a recipe a hundred times, and somehow not realize until its too late that the milk has to be scalded (and then, of course, cooled to room temperature), or that the water has to be room temperature (and not just out of the tap -- Note: I have two taps in my house, one of which dispenses water from my sandpoint, and it is filtered twice before it enters the kitchen, so I am fortunate that I don't have to buy spring water for these recipes.  But this water is cold, and needs to warm to room temperature before I use it), or the pre-ferments taken from the fridge in time for them to warm up.  This takes a fair amount of preparation and attention.  Sure, it gets easier the more you do it, but for the first few times you try, it seems like nothing is ever going to be ready at the same time. This is the real art of baking, I think: producing something in its proper time.  Maybe someday I'll get to that lofty ideal of mise en scène. 


Bread Science Fiction
While the two doughs are fermenting -- with far too much time on my hands -- I jotted down a science fiction chapter of something Peter Reinhart might write in the year 2025.  What will his breads be like then?  If you bother to read it, remember: really, this was meant to be a spoof.  It uses sarcasm.  Please don't take it too seriously.  I have a great respect for what Reinhart has done and continues to do.  Sure, it is cruel in places.  But I love Reinhart.  Really.

I feel that this disclaimer is the right Don Ricklesian thing to do.


Day 2: The Final Dough & Baking

The cat got me up at 0400 to let him out, and I couldn't get back to sleep.  Thinking that I wouldn't be baking until 0800 at the earliest, I left the refrigerated pre-ferment (the biga) in there until 0600.  The woodfire in the next room still had a few nice coals on it, so I tossed another log on.  The house hasn't been too cold overnight.

This is what it all looks like at six o'clock.  You can see that it has risen a tiny bit in the fridge overnight, but nothing spectacular.  The soaker has taken on a deep dark colour, and despite the fact that it has no yeast in it (other than what it might gain from the air), to me it actually looks like it has gotten fluffier.  Some of the cracks have filled in as it settled.  Now I just have to liquify the butter and the honey, and have everything wait until it reaches room temperature.


By eight the dough had not changed much -- no more rise.  I cut it up, dusted each piece with a bit of whole wheat flour, and mixed the ingredients of the final dough.  I had to dip my hands in water a couple of times, since the dough definitely gets a bit tacky as you work with it.  But it is just 3-4 minutes of kneading, and then you let it sit for 5 minutes.  This is the dough just before it rests:


After the resting period, you are supposed to knead it again for a mere one minute.  At this point, it is supposed to pass the windowpane test.  Well, come on now.  Sure, I can feel the gluten strands developing in the kneaded ball.  But when I go to straighten it out, to see if I can see light through the dough, the gluten strands tear far too easily.  This is a common problem with whole wheat doughs, I am told.  Real bakers tell me that it is due to the bran cutting into the gluten strands, so they don't develop those longish protein chains.  That's why whole wheat loaves are denser.  They simply do not rise like flour without bran.

You know, I hate to admit it, but when I first heard about 'The Windowpane Test' I assumed that it was a test for stickiness.  I imagined that you are supposed to throw your dough against the window, and if it sticks without sliding down the glass, it is the right consistency.


This dough tears apart rather than holds together long enough to see light through it.  Actually, I'd like to toss this dough out the window, at this point, because it isn't doing what I want.


So here it sits, waiting another 45-60 minutes until it rises to 1 1/2 this size.


Now, to me this doesn't look like it has risen 1 1/2 times its original size.  In fact, I have even waited an extra 10 minutes.  Then I just shrugged and got to shaping it.  It felt like a very thick, heavy dough.  Still tacky, but very dense.  Smells like the buckwheat honey that I used.


I carefully followed Reinhart's book on how to shape these two loaves, but I'm obviously not that good at it yet.  I think that this is where the real artisan part of breadmaking enters into it: only an artisan can manipulate dough to just the right shape and tension, so that the gluten causes the loaf to really spring upward when it hits the oven heat.  This requires a feel for the dough, and practice practice practice.  I'm not there yet.

I really doubted that I was going to get that panned loaf to rise 1 1/2 inches above the pan like he said it would.  And I really doubted my ability to get that batard off my homemade couche without wrecking it.  But I put the whole thing on a pizza peel, thinking that maybe I could slide it off somehow.


The dough rose a little bit in this proofing stage.  But getting the batard off the couche was a bit tricky.  I decided to lift it to the stone by sliding my scraper under one side of it.  To be expected, when moving it, it sagged and deflated a little bit.  I could have used a large metal pizza peel that I own (but never use anymore now that I have the wooden peel) to make the moving job easier.  I'll consider this next time.  Funny how Reinhart doesn't mention how he gets the proofed dough from the couche to the stone.

In the oven, the oven spring was slow, but it did happen.  My pan was a bit crooked, so the rise on the panned loaf is off-kilter.  Notice that, because of this, it ripped on one side.  Every cut in the loaf shows the typical furriness of the bran.


Just as these were coming out of the oven, my wife asked me which honey I was using.

"The Buckwheat," I told her, "it's the only kind we have right now."

She replied, "Oh, that's the expensive honey we bought up north.  We'll have to buy some crap honey for your baking."

I was dumbfounded.  "Crap honey...for my crap bread?"  It's true: she can't eat a lot of my bread, because I bake a lot of bricks.  It makes her wary of my 'hobby'.

She laughed, but she immediately knew she had hurt my feelings.  "I knew you were going to say that.  I shouldn't have said that, it was mean."

For lunch she ate the last couple of slices from Reinhart's Master Formula bread I made a couple of days ago, using my sourdough starter.

"This is good bread," she said.  And she was right.  It still tasted fresh.

I reminded her that it is important to use good ingredients if you want good bread.


Here is the obligatory crumb shot (along with some brussel sprouts and turnips we salvaged from our spring garden).  My wife likes this bread.  I, however, think it is far too sweet.

Notes to Myself:
  • make sure the loaf pans sit level in the oven, or the bread may rip when it has a wonky oven-spring
  • be extra gentle moving proofed loaves from the couche to the hot stone.  Use parchment paper if you aren't absolutely sure you can do it without distorting the loaf.  Or use a large metal peel to move it. 
  • don't be afraid to use the extra 5-10 minutes (or more!) on your oven that Reinhard advises; with all of the opening of the oven door performed when you spritz, and when you rotate the loaves, it is going to lose some heat.  Try a longer bake to see what happens.
  • remember to take loaves from their pans in a timely fashion, or they may develop too much moisture on the bottoms

Saturday, March 27, 2010

Everyday Bread #3

Following the experiment the other day, I said to myself that I would add something to the 5min/day mix I already had that would make it less wet.  I would consider that dough in my 5min/day bucket to be one ferment, and I would add another pre-ferment to it on baking day so that the moisture would equal out.  That was the plan, anyway.

In preparation for this experiment, I had a look at what Reinhart was doing with his various pre-ferments. I needed to compare some of the ingredients from his various mixtures to find one that I might be able to use.  I was looking here strictly at hydration, flour, and leaven (not so much interested in other ingredients like diastatic malt or salt, etc. at this time).  So I made up a little table, and scaled everything to 1 cup of flour (128 g) to see how they compare. All numbers in the table are in grams:

Firm Starter113 'barm'28-57 water
Mash0 yeast300 water
Biga45 'barm'108 water
Poolish34 yeast136 water
Pate Fermentee1 yeast377-439 water

Now, what I thought I wanted would be something similar to his 'Firm Starter' from his first book, The Bread Baker's Apprentice. So I made up a single cup version of the firm starter using the wild yeast, and left it out on the counter to ferment.  There wasn't much hydration in it, and it was slow to rise.  But rise it did!  After about 8 hours out, I put it into the fridge.  On baking day, I brought it out to warm up while I went to yoga class.

I measured how much dough I had before mixing them together.  I had 836 g of the 5/min day dough, and I had 97 g of the firm starter.  I mixed it all together by hand, and kneaded it on the counter, incorporating a fair bit of whole wheat flour as I kneaded.  The gluten in the dough developed quite nicely, and I could tell that the thing would hold together better on a pizza peal.

I decided to let it rise like an ordinary dough, then cut it and shape it and proof it again.

The dough doubled in less than an hour, but I gave it a full 60-70 minutes.

Then I shaped the dough as I did the other day, one for a pan and one for the pizza peel.  Since the dough is not so wet, I'm hopeful that this boule will not stick to the peel, but will slide onto the hot stone nicely using the cornmeal.  The big question is, since it's been out for an hour already, does it really need to proof another 90 minutes, or is another hour good enough?  I am going to try to wait for an hour, then pre-heat the oven a full 30 minutes this time, even though its already been out an hour.

Note that this dough has mostly wild yeasts, but not all wild yeast.  There is 1/2 a cup of wild yeast starter in the 5min/day dough, and 2/3 cup of it in the firm starter.  The commercial yeast did its job of raising the original 5min/day dough, and the glutathione that it left when they died should be no trouble for the wild yeast this time.  At least, that's the theory.

I don't know if you can see it or not, but just before putting this in the oven, after 90 minutes of proofing, the boule has a tiny area where the gluten cloak actually pulled apart. It has also settled a bit, so the dough is still quite wet.  The dough in the pan has risen a bit.
My wife walked in the front door just as I was taking this bread from the oven, and she said it smelled great: "like honey".  Note that, unlike Reinhart's bread, there is no honey in these loaves.  But they do have a nice honey-coloured crust.
This time I remembered to score the loaves, and they filled in nicely.  I didn't see the popcorn explosion, and I still didn't see all that much oven spring.

The crumb was definitely denser than the one from the other day, but it didn't spread while it sat out, it held its shape.  I think that the crust is superior, but I can't say that the taste is any better.  I mean, it tastes better than any store-bought whole wheat I've had, but it isn't better than the one from Everyday Bread #2.  It toasts up nicely though

Here is a side-by-side comparison of the crumb density.  The bread on top is the bread from 'Everyday Bread #2'.  See how the newer loaf on the bottom held its shape better?

Notes to myself:
  • Find the balance between wet dough and firm dough when you incorporate them.  
  • Let the wild yeast take its full time to leaven the dough.
  • Don't overproof - let the gluten determine when the proofing is done.

Wednesday, March 24, 2010

Everyday Bread #2

Time for another experiment: I'll be working nights for the next couple of days and won't be able to do another of Reinhart's intensive breads.  For my everyday bread this time I will use the Master Recipe from 'Healthy Breads in Five Minutes a Day'.  But the experiment will be to add some sourdough starter again.

I'll just back off a bit on the amount of sourdough starter that I had been playing with in my last bread test.  That was with the 'Artisan Bread in Five Minutes a Day' Master recipe.  But I am after whole grains: I'm leaving that first book behind for now.  That is why I'm changing recipes for this next experiment.  So I've put in about 1/2 cup of whole wheat seed starter (or Barm, or MotherStarter -- I still haven't determined what I should be calling it), and I've taken out 1/2 cup of the whole wheat.  This should change slightly the hydration, making it even wetter.

The first thing I noticed, in fact, was that it stirred up a lot easier than I am used to.  Here is a picture of the mix prior to its rise:


I was going to let it sit it out at least 2 hours before going to work.  If it wasn't doubled by then, I thought, I'll leave it sit out until I get home again -- over 12 hours of ferment.

I needn't have worried.  It was doubled in 40 minutes.  But I'll give it the full 2 hours at least to ferment.


I let it sit out a couple more hours before refrigerating.  In that time, it actually rose another 1 1/2 inches or so (even after it had reached the level you see here).  I stuck it in the refrigerator overnight, and when I came to make the bread (24 hours after mixing), it had fallen about 3 inches in the fridge.

I shaped the dough into 2 forms, and discovered that the gluten strands were not well developed.  I was reading somewhere in Reinhart's first book that the mixture of commercial and wild yeasts might leave more glutathione in the dough, which will break apart the gluten.  Maybe that was it.  The theory is that the commercial yeast caused the rapid rise, but then died, leaving all this glutathione, which broke the gluten strands that had bee developing.  The wild yeast was more hardy, but after the commercial yeast ate everything, there was little they could do.  That is why the dough fell so far, in the fridge.

The other thing is, these doughs are very wet.  They simply do not rise in the proofing stage, they spread.  That is why I opted for the pan, and for the parchment paper.  I've had bad luck with the pizza peel, because the moisture from the dough just oozes out onto the cornmeal and makes it stick to the wood.

I also thought that this time, since I had one dough in a pan, I could slip it into the oven when the oven was hot enough, and not wait for the stone to get hot (our oven pre-heats in 15 minutes, while the authors of the 5 min/day books suggest the stone and the pan need to be pre-heated at least 30 minutes).

The only problem with doing this was, the loaf in the pan didn't get fully proofed.  What difference could 15 minutes possibly make?  Take a look.  Here are the results of the experiment. 

Once again, I forgot to score the loaves.  The one that was underproofed 'popcorn exploded' again.  Someone recently gave me a link to the Northwest sourdough bread webpage that gives a lot of troubleshooting advice.  He says that this is precisely what you get if you underproof a sourdough loaf.

After 25 minutes in the oven, I removed it from the oven, and turned it upside down to try to get the loaf from the pan.  It was stuck -- so I was just going to wait a bit, to let the steam soften it, as per the suggestions of the 5min/day people.  But when I looked underneath my cooling rack, after setting aside the pan, I noticed this big blob of uncooked dough.  My shaking had emptied much of the uncooked middle of the loaf out onto the counter, through the split in the top.  Another bread disaster.  It wasn't even cooked inside despite that ruptured crust!  I plopped it back into the oven for another 20 minutes.

The other bread that I had formed into a boule was proofed okay because it had those extra 15 minutes -- but it really had no oven spring at all.

Now for the money shot.  How was the crumb?  Well, as you can see from the first picture, the blob that fell out of the middle left quite a hole.  In the second picture, the boule looks okay, even though the crust separated a bit.  There's a word for that, but I can't remember it.

 Actually this bread (both of them) tastes great.  And the crumb isn't too bad, even if it didn't get a decent oven spring.  But here's the other thing: this bread stales very quickly.

I still have a tiny bit of dough from that 5min/day bucket, and the next time I bake, I want to try something else.  I want to add something to it, and knead it, and see if I can't get the texture to stand up a bit instead of just oozing outwards.

Notes to Myself:

  • add something to the dough so that it is a teensy bit less wet.
  • add some more yeast, the commercial yeast died and left too much glutathione.
  • let it proof a full 90 minutes

Whole Grain Breads Master Formula - wild yeast version


This is the very first bread that I've made from Reinhart's Whole Grain Breads book. I probably should have made the yeasted version, or better yet, made the yeasted version and the motherstarter version side by side. But since this was my first try at any recipes in this book, I wanted to be careful and I didn't want to get mixed up. And I had refreshed my starter within 3 days, so now was the perfect time.

This bread is a 100% Whole Wheat Sandwich bread, and like most of the breads in this book, it comes together 'like epoxy' by creating first a soaker, and then a biga, and a little bit more raw material on baking day. It takes 2 days to make. The whole idea is for some pre-fermentation to occur before you bake it. Reinhart says that this allows the enzymes to work at the whole grains, so that more complex flavours are developed. I am not willing to swear to that, but having eaten a couple of slices now from my first loaf, I have to agree that it tastes good. On the other hand, is that due to the addition of honey and scalded milk? There doesn't seem to be all that much, but the addition of fructose and lactose is going to sweeten the loaf. So you are getting some extra sugars on top of all that carbohydrate.

On to the pictures of the process.
Day 1, Mise En Place, the ingredients for the Biga and Soaker:

The Soaker (on the right, below) is just mixed and you can forget about it. It gets to stay out at room temperature 12-24 hours, i.e. until you bake with it the next day. The Biga has to sit out only 8 hours, and then it can be refrigerated. The first thing I noticed was that the Biga didn't rise so much. I assumed that was due to my newly refreshed 100% rye motherstarter not knowing what to do with whole wheat. It was room temperature from the fridge; but perhaps it was stunned. Eventually it did decide that whole wheat was worth fermenting, however, and I did get some sort of a mucky increase in volume, although I wouldn't call it a rise.

Day 2. Now we are mixing dough for bread.

I had all my instructions written on a card, which I misplaced at just the worst moment, when I was trying to time my mixing and kneading to Reinhart's direction. In the end, I overworked the dough by giving it about 3 minutes more kneading than I was supposed to.  I'm not sure why I wasn't getting the rise that I wanted.

Not knowing what to expect from the bread, I decided my first loaf would be made in a pan, rather than on my baking stone.

The second rise took about 4 hours, much longer than Reinhart said it would. I had spent all day watching this dough, and I was beginning to feel like mine was a wasted life.  To pass the time, I tried to find some information on how healthy whole grains are.  What I found was controversial.  I will have to report on this in another blog.

Despite the crooked way the dough ended up in the pan, it baked up all right (even though I forgot to slash it). Now I had oiled the pan, but the dough still didn't want to come out easily, so I just sat it down until the pan cooled a little, and then it slid out better. The only problem was, it was now a little moist on the bottom, so I stuck it back in the (still warm) oven so that some of this moisture could evaporate. It did, but because I had placed it upside down on the oven rack, the loaf had settled a little.

So the crumb was a little more dense looking than the picture of Reinhart's bread in the book.

Notes to Myself:
  • double the recipe, at least. It is a lot of work for just one loaf. 
  • Next time, try the batard shape.
  • Make the yeast version of each recipe first
  • Check your motherstarter.  Did you miss a step, going from barm to motherstarter?